-->

Wednesday, 23 December 2015

Channel Groupings In the Acquisition section's Overview and Channels reports, you can see your data organized according to the Default Channel Grouping, a rule-based grouping of the most common sources of traffic, like Paid Search and Direct.

About Channel Groupings

In the Acquisition section's Overview and Channels reports, you can see your data organized according to the Default Channel Grouping, a rule-based grouping of the most common sources of traffic, like Paid Search and Direct. This allows you to quickly check the performance of each of your traffic channels.
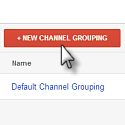
The default channels meet the needs of most Analytics users, but if you have specific analysis requirements and want to label your traffic in other ways, you can create a new Channel Grouping (recommended) or edit the Default Channel Grouping.
When you create a new Channel Grouping in a view, you:
  • Can immediately select it in the Acquisition Overview and Channels reports.
  • Can apply it retroactively and see historical data classified by your new channel definitions.
  • Change how reports display your data, without changing the data itself.
When you edit the Default Channel Grouping for a view, you:
  • Permanently change the raw data for new sessions by altering how Analytics labels incoming traffic. All sessions that occur after you edit the Default Channel Grouping are labelled according to your updated channel definitions.
  • Can’t apply your new channel definitions retroactively, so the historical Channel Grouping of traffic won’t change.
Note: The Acquisition section Channel Groupings and the Multi-Channel Funnels Channel Groupings are currently separate features.
You can create a new Channel Grouping and immediately see it reflected in your reports.
  1. Sign in to your Analytics account at www.google.com/analytics.
  2. Click Admin.
  3. Use the AccountProperty, and View drop-down menus to navigate to your desired view.
  4. Click Channel Settings.
  5. Click Channel Grouping.
  6. Click the +New Channel Grouping button.
  7. Enter a name for your new channel grouping
  8. Click +Define a new channel.
  9. Enter a name for your new channel.
  10. Define the rules for the new channel.
    1. From the first drop-down menu, select a dimension.
    2. From the second drop-down menu, select an operator.
    3. In the text field, enter the value you want to use. For example, Source contains plus.google.com.
    4. Add AND and OR statements as necessary, then click Done.
  11. Add and define additional channels.
  12. Drag the channels to specify the order in which they should apply.
  13. Click the Save button.
You can see your new Channel Grouping in the Channels report by selecting it as a primary dimension from the Default Channel Grouping drop-down menu.
You can edit the Default Channel Grouping to define new channels, remove existing channels, and change channel definitions. You can’t edit the system definition, but you can use different dimensions to redefine an existing channel.

Example

You can change the definition of the Social channel from "System Defined Channel exactly matches Social" to "Sourcecontains plus.google.com|facebook.com."
Remember, any changes you make to a view's Default Channel Grouping:
  • Permanently change how Analytics classifies your traffic.
  • Are visible to all users of the view.
  • Are not applied retroactively, so historical Channel Groupings do not change.

To edit the channel definitions:

  1. Sign in to your Analytics account at www.google.com/analytics.
  2. Click Admin.
  3. Use the AccountProperty, and View drop-down menus to navigate to your desired view.
  4. Click Channel Settings.
  5. Click Channel Grouping.
  6. Click Default Channel Grouping.
  7. To edit a channel, click the edit icon (pencil).
  8. Edit the rules for the channel.
    1. From the first drop-down menu, select a dimension.
    2. From the second drop-down menu, select an operator.
    3. In the text field, enter the value you want to use. For example, Source contains plus.google.com.
    4. Add AND and OR statements as necessary, then click Done.
  9. To add a new channel, click Define a new channel.
  10. To remove a channel, click the delete icon (X), then click Delete Rule in the pop-up.
  11. Click the Save button.
If you edit the default channel definitions, you can go back to the defaults by clicking Reset channels at the top of the list. This is not retroactive; any sessions that occurred before you reverted to the default channels will still be classified with your prior channel definitions.
Channel Grouping uses raw (unfiltered) dimension values to classify a session into a channel. This means that Channel Grouping ignores mutated or altered dimension values due to any view filters you may have.

Example

You use a Search and Replace filter to change a campaign name from Campaign A to Campaign B. If you include Campaign Bin the definition for Channel X, any sessions resulting from clicks to Campaign A won't be grouped into Channel X.
AdWords dimension values at daily processing time are used to permanently determine the Channel Grouping for traffic. If these dimension values change (for example, a campaign is renamed in AdWords), the historical Channel Grouping of that traffic will not change. You may notice differences between your AdWords reports and Channels report because the AdWords section reports the current or “live” (at report load time) dimension values of AdWords traffic.
NEXT ARTICLE Next Post
PREVIOUS ARTICLE Previous Post
NEXT ARTICLE Next Post
PREVIOUS ARTICLE Previous Post
 

Delivered by FeedBurner